Umbraco Razor XML Sitemap
This article is outdated and while some concepts may apply, the code samples may not work.
Creating an XML sitemap in Umbraco that automatically updates based on the types of pages you create can be easily achieved using razor. XML sitemaps are something that Google webmasters should be familiar with since as a webmaster, you will be asked to submit a sitemap for Google to crawl.
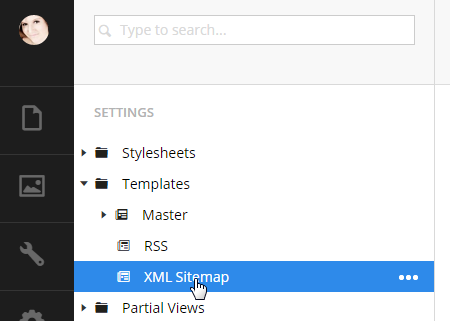
First let’s setup an XML Sitemap template in Umbraco. Login and head over to your Settings section. Right click on Templates and click Create. Name your new template, for this case I’ve named my new template XML Sitemap, since this way the name sitemap can still be used for a user sitemap that people can view.

Using Umbraco 7, setup the following code on your new XML Sitemap template. If you are using a version of Umbraco that supports razor, place the following code into a macro on your new template.
@inherits Umbraco.Web.Mvc.UmbracoTemplatePage
@{
    Layout = null;
}
@{
	umbraco.library.ChangeContentType("text/xml");
    int level = 6;
    var home = @CurrentPage.AncestorOrSelf(1);
    var pages = @home.Descendants().Where("hideInSitemap == false");
}
<urlset xmlns="http://www.sitemaps.org/schemas/sitemap/0.9">
	<url>
		<loc>@Request.Url.Scheme://@Request.Url.Host</loc>
		<lastmod>@home.UpdateDate.ToString("yyyy-MM-ddTHH:mm:00")+00:00</lastmod>
		<changefreq>daily</changefreq>
		<priority>0.8</priority>
	</url>

	@foreach (var page in pages)
	{
		if (page.Level <= @level)
		{
			<url>
				<loc>@Request.Url.Scheme://@Request.Url.Host@page.Url</loc>
				<lastmod>@page.UpdateDate.ToString("yyyy-MM-ddTHH:mm:00")+00:00</lastmod>
				<changefreq>weekly</changefreq>
				<priority>0.5</priority>
			</url>
		}
	}
</urlset>
Breakdown
First we want to tell Umbraco to output this code as xml with the umbraco.library.ChangeContentType("text.xml"). Next we are going to declare the max level for the sitemap to loop through. This number is going to vary depending on your particular website needs. For this purpose I’m going to set my level to 6 since most pages won’t be this deep. Setting up some basic variables will make it easier for us to reference so lets setup home by telling Umbraco to go to the first Level and get that node. Then we are going to define the pages by telling Umbraco to list all the descendant pages of home that are not marked hide in sitemap. This hideInSitemap value is a custom property on our document type for the various pages.
Now that our variables are setup, lets starting writing our XML sitemap. First we declare our schema type and then open our <url> tag. Inside of the <url> tag we are going to set our <loc> with some C# to get our URL scheme and host. Using this allows us to build this code out on a test site and then push it live and the URL for the site will update to the new live site domain. This way allows us to avoid hard coding a link that could be missed when we move this code to a production environment. For general purpose in this example I’ve setup my <lastmod> tag to use the date that the homepage was last updated. Next set a value for your <changefreq> and <priority>. This concludes the <url> section.
Once we have setup your <url> tag for the homepage and closed it. We need to setup a <url> tag the same way for every page in our site that we want in the sitemap. This is where we are going to use a foreach to loop through every page in our pages list. Inside of this foreach we are going to setup each <url> tag the same way as we did for our homepage. The one thing you will need to change is the update date for each of the individual pages, instead of using home, we will use the individual pages last updated date for this (see line 25).
Once we have setup our foreach we need to close our <urlset> and then we have our code that makes our sitemap. If you want to get more specific in setting up your pages to loop through, instead of just using a hide in sitemap checkbox, you can add filters in your where statement to ignore certain document types or whatever you need to make your list. This code will be specific to your Umbraco website needs.
Now that we have our code all written on our template, we want to render this page. You can either create a new xml sitemap document type and assign this new template to it so that you have an actual page in the Content section or you can view this alternate template on your homepage of your site. In Umbraco 7 you can view alternate templates by appending ?alttemplate=Alias to your URL. Our alias for this new template is XMLSitemap so the URL that we would submit to Google would be domain.com/?alttemplate=XMLSitemap.
You can view an example of this method on this blog here: http://letswritecode.net/?alttemplate=XMLSitemap.