Setting Up Open Graph in Umbraco
This article is outdated and while some concepts may apply, the code samples may not work.
Let me start this by saying, if you do this your marketing team will thank you! Sharing articles and webpages via social media is a very good way to drive traffic to your site, which I learned with my 24days.in/Umbraco/ article I wrote and shared via twitter. With that being said, when other people share your link online you want the best information to show up that will entice your demographic to visit your site! You need to catch their attention visually and give them an enticing reason to check out your content.
Setting up open graph tags in Umbraco is a really simple way to make sharing via social media work better for you.
Let’s get started.
Whether you have a new Umbraco site you are setting up or you are going into an existing Umbraco website to setup open graph, you can do this easily by taking advantage of Umbraco’s document type inheritance. I’m going to use this blog as an example so you can see firsthand the output that this will give you. Once you get logged into Umbraco, head over to the Settings section and find your parent document type for most (if not all) of your main content pages. I typically add my open graph properties to the master and setup some defaults so that no matter what page you share, you can customize what shows up in social media. My Master document type is used for all of my sharable content so I’m going to add a new tab called Open Graph here.
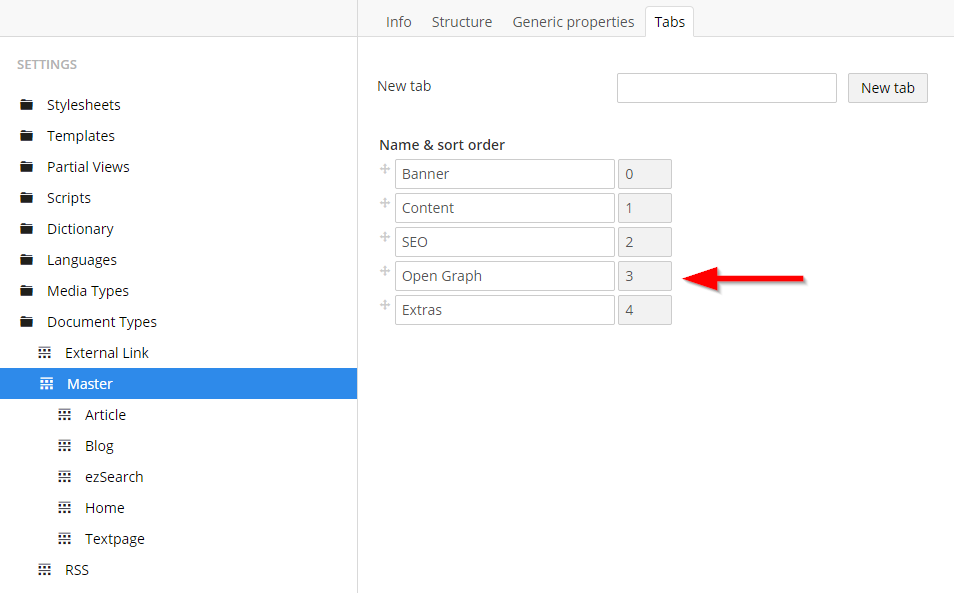
Click the Tabs tab and enter the name of your new tab, and then click New tab. Your new tab will show up on your master document type. In my case, I already have my site setup so I have multiple tabs on my document type.
With your new tab in place let’s click on the Generic properties tab on our master still. This is where we will add the new open graph properties that will be the same throughout every page. Add the following properties to your new Open Graph tab on your Master document type.
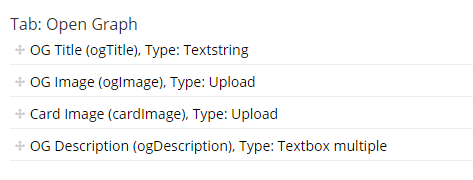
If you are familiar with the open graph tags that you need, these will be pretty self-explanatory, for those who aren’t hang tight, I’ll show you the code and what is outputted so you can see how it is used. For my needs I chose to set the ogImage and cardImage to upload properties. Typically for client sites I use the media picker option but this is personal preference.
Note: The code I use gets these images assuming the upload property is used. If you use the media picker you will need to modify the code to get the media item with @Umbraco.Media(alias).Url.
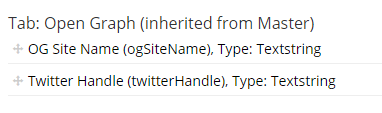
So we have our master setup, now there are a few properties that we only need on the homepage of our site for the open graph tags so let’s go to our homepage document type and click on the Generic properties tab and add the following properties to your open graph tab.
Now that we have all our properties, we need to get the code in place to output the data. Create a new partial view in Umbraco called _SocialMetaTags. This is where we are going to put our open graph code.
@inherits Umbraco.Web.Mvc.UmbracoTemplatePage
@{
    var home = CurrentPage.AncestorOrSelf(1);

    var ogType = "website";
    if (CurrentPage.DocumentTypeAlias == "Article")
    {
        ogType = "article";
    }

    var metaTitle = CurrentPage.Name;
    if (CurrentPage.HasValue("ogTitle"))
    {
        metaTitle = CurrentPage.ogTitle;
    }

    var descrip = home.oGDescription;
    if (CurrentPage.HasValue("ogDescription"))
    {
        descrip = CurrentPage.ogDescription;
    }

    string ogImage = string.Empty;
    if (CurrentPage.HasValue("ogImage"))
    {
        ogImage = String.Format("{0}://{1}{2}", @Request.Url.Scheme, @Request.Url.Host, @CurrentPage.ogImage);
    }
    else if (home.HasValue("ogImage"))
    {
        ogImage = String.Format("{0}://{1}{2}", @Request.Url.Scheme, @Request.Url.Host, @home.ogImage);
    }

    string cardImage = string.Empty;
    if (CurrentPage.HasValue("cardImage"))
    {
        cardImage = String.Format("{0}://{1}{2}", @Request.Url.Scheme, @Request.Url.Host, @CurrentPage.cardImage);
    }
    else if (home.HasValue("cardImage"))
    {
        cardImage = String.Format("{0}://{1}{2}", @Request.Url.Scheme, @Request.Url.Host, @home.cardImage);
    }

    string handle = "";
	if (home.HasValue("twitterHandle"))
    {
        handle = "@" + home.twitterHandle;
    }

    <!--Facebook Open Graph-->
    <meta property="og:locale" content="en_US" />
    <meta property="og:type" content="@ogType" />
    <meta property="og:title" content="@metaTitle" />
    <meta property="og:description" content="@descrip" />
    <meta property="og:url" content="@Request.Url" />
    if (ogImage != "")
    {
        <meta property="og:image" content="@ogImage" />
        if (cardImage != "")
        {
            <meta property="og:image" content="@cardImage" />
        }
        <meta property="og:image:type" content="image/jpg" />
    }
    <meta property="og:site_name" content="@Html.Raw(home.ogSiteName)" />

	<!--Twitter Card Data-->
    <meta name="twitter:card" content="summary_large_image" />
	if(handle != "")
	{
		<meta name="twitter:site" content="@handle" />
		<meta name="twitter:creator" content="@handle" />
	}
    <meta name="twitter:title" content="@metaTitle" />
    <meta name="twitter:description" content="@descrip" />
    if (cardImage != "")
    {
        <meta name="twitter:image:src" content="@cardImage" />
    }
    <meta name="twitter:domain" content="@Request.Url.Scheme://@Request.Url.Host" />
}
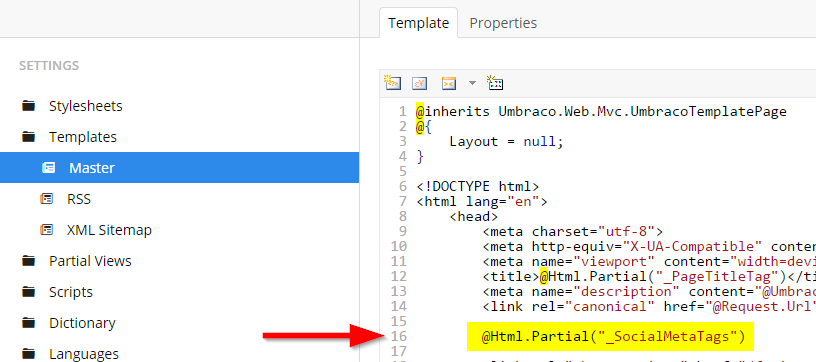
Once you have inserted the code and saved your partial, you will need to go to your master template and insert the partial.
Now that you have your properties and code in place, try filling out some of the open graph information on your content nodes and check your page source to see what is outputted. You should be seeing all the things you filled out appear where you put your partial on your master template.
Breakdown
The social meta tags code assumes that you have a website for your ogType unless you have a specified “Article” document type it will then change the ogType to article. Umbraco websites are setup differently so your document type alias for an article may not be what is in the code (line 8) so you can change this to match your site needs or remove the if statement all together if you don’t have any articles.
The basic functionality of the code is to use the open graph information on a page and if that is not filled out, it will use the homepage as a default for open graph information, except for the title which will default to using the current page’s name.
The twitter handle by default is set to empty but if it is filled out on the homepage (first level item) then the twitter properties will display. The domain and URL are pulled in dynamically from the current page’s URL. This is nice when you are moving from a test to live environment so that you don’t have to go back and change URLs, nothing will be “hard coded”.
With this you will be on your way to setting up open graph tags in Umbraco in no time. If you setup your open graph in Umbraco differently I’d like to hear how you do it in the comments below!