Make Your Content Editors Happy
This article is outdated and while some concepts may apply, the code samples may not work.
There were many great talks this year at Code Garden and one hit really close to home for me because it involves what I do every day at work. Dave Woestenborghs’s talk on making your content editors happy had a lot of excellent points to help people setup content editor friendly Umbraco sites and I thought this would be an excellent topic for a blog post. Here are some takeaways from his talk with my own experience mixed in.
Setting up your Umbraco website starts with your Document Types. I can’t begin to stress how important it is to set these up properly to save everyone time in the future when updating the website. This initial phase probably takes the longest with the planning and evaluation but it has the most impact on your back office and can either help or hinder the amount of code you have to write. This setup is also going to be what the editor’s see when they manage their content and that makes this step even more important!
Choose the right properties
When you setup your document types there are some things to remember when thinking about your content editors. First you need to make sure you use the correct property editors, this is something you determine in your initial design evaluation. Using the correct property editors is going to reduce the amount of properties you need on a document type and make it less confusing for your editors.
For example, the difference between a textstring or a content picker. These two fields do something completely different and return different values but can both be used as setting link URLs. A textstring can be used to give an editor the freedom to put in their own link, which could be to a media item or a third-party website, whereas the content picker can be used to set a link to a particular content page within the site. Knowing what your editors needs are and if you may need to limit their choices based on design would allow you to determine which property you would need for this item.
Customize your properties
When you get familiar with the Data Types available in Umbraco your setup becomes simpler because you have a better understanding of what is available to you and how to take advantage of it. One of the more commonly used data types in Umbraco is the Rich Text Editor. The RTE is a great tool and allows your editors to have a lot of control, but sometimes that can be too much control. There are cases where you may need to limit the functionality of the editor, for example, creating a simple editor or removing the ability to insert macros. You can customize the RTE in the Umbraco developer section. By changing the options allowed on the RTE toolbar you can add or remove functionality that the editors can use. You can also setup the image sizes when they are inserted with the RTE. This can default images to the largest size and then let the editor scale them down as needed.
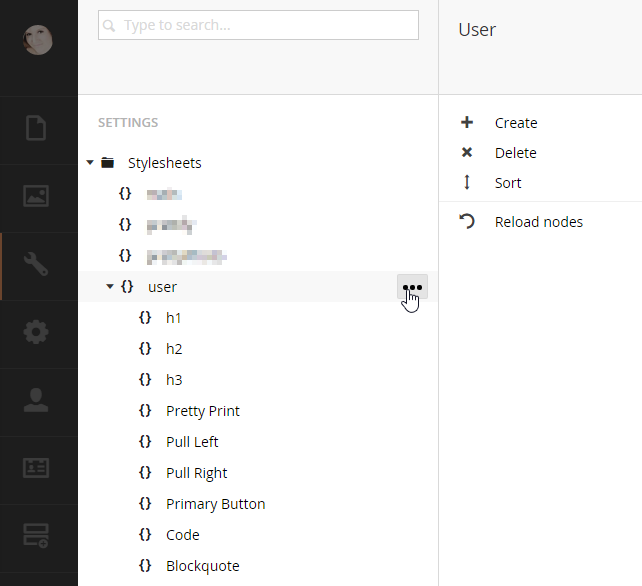
The RTE also lets you assign a style sheet. This feature in particular is very useful and should almost always be setup to give your editors some styling options for their text. Common properties include header tags, aligning images, color options, and button link styles.
Enter, user style sheet…
For those of us who use Visual Studio, or another IDE to write code (that is anything besides Umbraco’s editor) the user style sheet comes in handy. The user style sheet is usually very simple and just includes an import rule of the main css file used by the site.
@import url('/css/main.css');
Having the user style sheet setup allows developers to modify the css without worrying that Umbraco is going to overwrite their file with a cached version when a style is added to the RTE (it happens).
By assigning the user style sheet to the RTE we can define the users’ allowed styles here.
We can also specify how the user style displays in the RTE. For example, say you have a button class that has been added to a link in the RTE. The button style has white text. When the user sees this rendered in the RTE they can no longer see the button text because the white color blends in with the white RTE background. Technically, this has the initial desired effect because we want the user styles to display how they appear on the front end of the site, but this one in particular needs to show differently so that the user can still see their content. This is where you would modify the user style sheet to change the color of the button class.
TIP: The user style sheet is only used by the RTE, the website does not reference the user style sheet.
@import url('/css/main.css');

.mceContentBody, .mceEditorIframe {
	background:#FFFFFF !important;
}
/* EDITOR PROPERTIES - PLEASE DON'T DELETE THIS LINE TO AVOID DUPLICATE PROPERTIES */
h1 {

}
h2 {

}
.btn btn-primary {
    color: #000;
}
Once you update the user style sheet and refresh Umbraco, the user will see the updated button color in their RTE while the front end of the website remains the desired white color.
Setting up these properties can be very helpful to your editors but fair warning, if you give an editor too many options it can get confusing and even messy. You know that whole saying about “give them an inch and they take a mile”? It happens, so just keep it in mind and make sure you point it out while you are training your editors so they know there are some expectations.
Group your properties
When you are setting up your document types, you can group your properties by tabs. This is a simple way to keep things organized on your document types and makes it easier for your editors to find things. For example, you have can have a Footer tab that includes all the properties related to your website’s footer and a Content tab that includes properties for the basic content on the page.
TIP: A good way to setup your properties is by how they appear on the front end of your website. You should also try to organize tabs this way too when possible.
Describe your properties
Document types allow you to add a description on your properties. When you are adding a new property, fill out the Description textbox in order to show a note below the label. This note can help your users in figuring out what to do with this property if it may not be entirely obvious. You can use these notes for things like listing image dimensions, or letting the editor know that if the field is empty the name will be used as a backup.
Use descriptive labels
Use naming conventions that are easy to understand. Don’t label your properties with your company jargon that only people who work on your team can understand. Save that for your aliases. Your property labels need to be simple and easily understood by your editors who usually aren’t as technical savvy as developers.
You can also apply this concept to naming your macros that are allowed in the RTE. They don’t have to be super long, just something that quickly gets the point across like Bios List. Just keep it simple!
Using Packages
There are plenty of helpful packages out there that can help improve your editors experience and make setting up Umbraco sites a bit easier but be wary of using too many packages. Typically I may install anywhere from 1 to 3 packages on my site setups. I am not a big fan of using a ton of packages and I would prefer to write my own code if it is something within my realm of know how.
A few awesome (FREE) packages from the Umbraco community include:
- Archetype
- Doc Type Grid Editor
- Nested Content
- Bookshelf
I’ve found some of these very helpful when setting up Umbraco installs and if you haven’t heard of them you should definitely check them out. Have any other tips you’d like to share that I didn’t cover here? Let me know in the comments below!